Showing posts with label NCEA. Show all posts

Thursday, October 13, 2016

Educated Spectators Can Help Keep Riders Safe

Horses are not 'big dogs.' Dogs are predators. Horses are prey animals.

Given the choice of fight or flight, horses choose flight almost every time.

What we perceive as spookiness is actually the result of millions of years of evolutionary conditioning urging a horse to flee from danger. The horse who doesn't spook and run away is the one who gets eaten by the mountain lion.

It isn't possible to completely train this behavior out of a horse. Even the oldest, calmest, most bomb proof lesson pony is going to spook now and then.

In short, a horse can be thought of as a 1000 lb. deer.

With all this in mind, here are eight things you can do to be an educated spectator and help keep riders and horses safe:

1. Set up ringside tables and tents prior to the morning schooling so all horses have a chance to see them before the show starts. Stake your tents into the ground so they don't flip over if a big gust of wind comes along.

2. Secure all loose materials such as banners, tablecloths, paper plates, and plastic bags. Make sure nothing is flapping in the wind. Keep checking throughout the day to make sure everything stays put.

3. Avoid sudden movements ringside when a rider is on course or a flat class is in progress. Children running/playing right outside the ring or the opening of an umbrella can trigger a spook. Move slowly and quietly. If your show facility has metal bleachers, walk quietly or wait until the ring is vacant between classes to move to/from your seat.

4. Unless you are a coach, rider, or horse holder, stay out of the horse holding area. Large groups of people can make horses nervous, and if the area is too crowded a spooked horse can injure people standing nearby.

5. If the announcer asks the crowd to hold their applause for a certain horse, please comply. If the horse provider thinks the issue is important enough to notify the steward, who then notified the announcer, it is not a request to be taken lightly.

6. If a horse spooks and begins running away with a rider in the arena, please stay in your seat, stay quiet, and stay calm. Horses pick up on the energy of the crowd. The horse is already scared, and reactivity from the crowd can make it worse. The best way for you to help is to stay seated and allow the professionals to handle the situation.

7. As the end of the show approaches, avoid packing up your tent, tables, chairs, etc. while a class is in process. The classes at the end of the show tend to be lower level (novice and beginner) with less experienced riders that may not have the skills yet to handle a big spook. Also, these riders have been waiting around all day for their time to shine. Be respectful of all the hard work they've put into their preparation and give them the opportunity to do their best.

8. If you see something, say something. A child rolling down the grass hill next to the ring, a loose tablecloth next to the concession stand, or a sweet grandmother about to open her umbrella can all create a dangerous situation, but you as an educated spectator can play an important roll in keeping our kids and horses safe.

Amanda Garner is an Interscholastic Equestrian Association (IEA), Intercollegiate Horse Show Association (IHSA), and Georgia Hunter Jumper Association (GHJA) steward, schooling show judge, and the owner of Epiphany Farm, LLC in Dahlonega, Georgia. She is also a member of the IEA Board of Directors, chair of the IEA's National Education Committee, and the author of "A Parent's Guide to the Interscholastic Equestrian Association."

By being an educated spectator you can help keep riders safe


Tuesday, December 9, 2014

Five Books IEA Riders Should be Reading

No matter how much time you're able to spend in the saddle, there is always more to learn. All equestrians can benefit from supplementing their lesson instruction with books written by successful riders and trainers.

So, just in time for the holidays, here is my list of five books IEA riders should be reading.

1.  Hunter Seat Equitation by George H. Morris


Could any equestrian book collection not include this definitive volume by the master horseman himself? In this timeless classic, Mr. Morris describes rider position and aides on the flat and over fences, lateral and longitudinal flexion in the horse, proper horse and rider turnout, and the fundamentals of horse showing, all with the frankness and attention to detail that you would expect. A must-read for every aspiring equestrian.

Once you've read the book, I encourage you to sign up for one of his clinics. I guarantee you will come away from the experience a stronger, and more humble, equestrian.


2.  Centered Riding by Sally Swift


Ms. Swift's book teaches riders how to work in harmony with their horses using yoga-like techniques such as breathing, balance, and body awareness. It is also full of illustrations and metaphors that can help visual learners grasp abstract concepts. Have you ever thought of yourself as an ice cream cone slowly melting down around your horse, or of your horse as a train travelling down a track? I personally use many of her methods in my own teaching and feel that her system of working through "feel" rather than simply through "mechanics" helps create happy horses and riders.


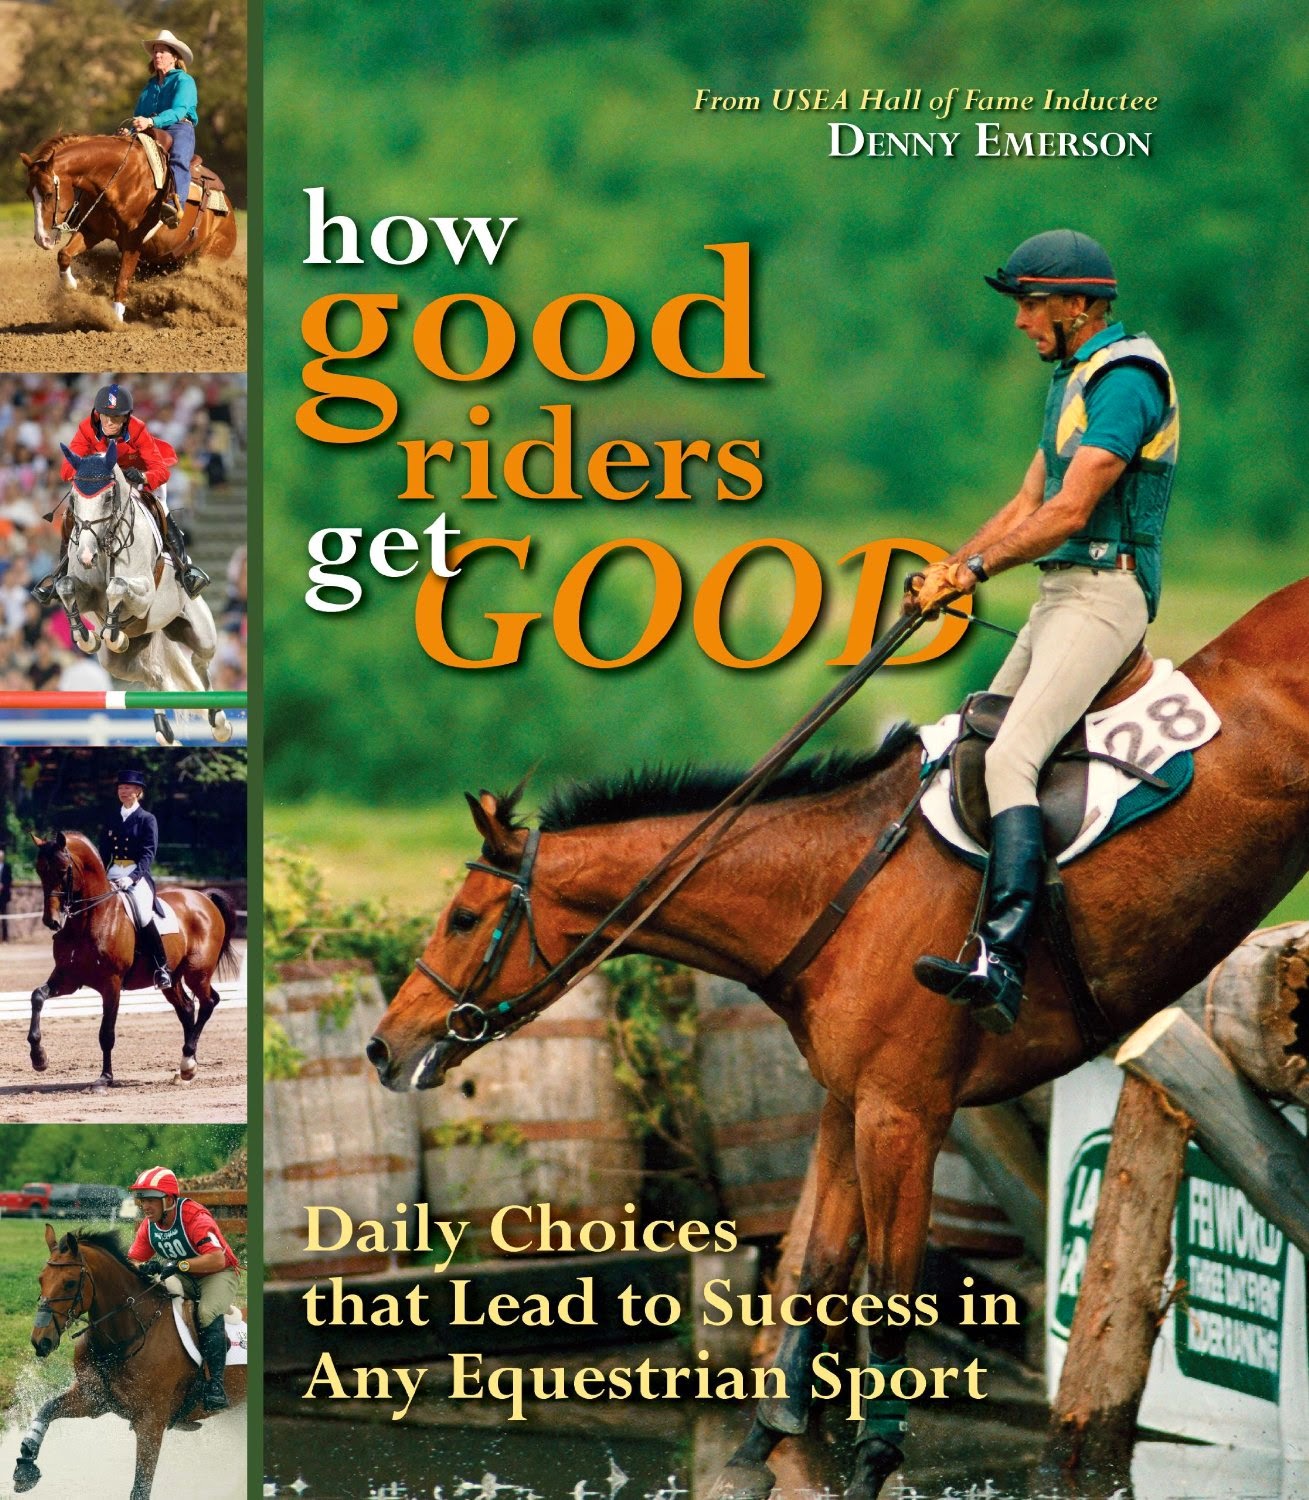
3.  How Good Riders Get Good by Denny Emerson


The purpose of Mr. Emerson's book isn't to teach you how to ride.  You won't find anything in there about "inside leg to outside rein" or "finding the perfect rhythm to a fence." Instead, it's a sports psychology book designed to help young riders develop their own path towards success based on their own personal circumstances.

Have you ever heard someone say, "I can't be an upper level rider because I can't afford a good-enough horse?" Emerson dismisses that kind of negative thinking with chapter titles such as, Wannabes versus Gonnabes, Dealing with the Cards you Hold, and Nine Character Traits for a Successful Rider. Throughout the book he also profiles dozens of famous riders, many of whom made it to the top though years of hard work, dedication, and sacrifice despite being born into families of modest means. This is a great book for aspiring professionals who want to learn the non-horse related skills necessary to make it in this business.

I also encourage IEA riders to visit Mr. Emerson's facebook page, Tamarack Hill Farm, where he regularly shares knowledge he has gained through his 60+ years of experience. I learn something from every post he makes.


4.  The United States Pony Club Manuals of Horsemanship by Susan E. Harris

I cheated a little bit here, because this is actually a set of three books:


Have you ever followed the IEA facebook trivia contests and wondered where many of those questions come from? In addition to being required reading for students involved in United States Pony Club (USPC), these manuals are also the basis for many written horsemanship tests, such as the horsemanship test offered each year at IEA National Finals.

The first volume covers the basics of riding, nutrition, grooming, hoof care, tack, and horse conformation.

The second volume builds on the information presented in the first. Topics include riding on the flat and over fences, horse care and management, conditioning, health care, wrapping and bandaging, and ground work.

The third and final volume is intended for those pony clubbers who wish to ride at an advanced level, manage a farm, and train young horses and/or teach riding as an equine professional.


5.  A Parent's Guide to the Interscholastic Equestrian Association by Amanda Garner


Shameless plug...In no way am I suggesting that I can hold a candle to the great horsemen/women listed above, but I do believe every IEA rider can benefit from learning more about the rules, regulations, and general structure of the IEA, as described in my book.

In Conclusion
So this is my list, I'd love to hear from my blog readers, what's on your horsey reading list?  Click back over to my facebook page and leave a comment.

Amanda Garner is an Interscholastic Equestrian Association (IEA), Intercollegiate Horse Show Association (IHSA), and Georgia Hunter Jumper Association (GHJA) steward, schooling show judge, head coach of the University of North Georgia IHSA Equestrian Team, and owner of Epiphany Farm, LLC in Dahlonega, Georgia. She is also a member of the IEA Board of Directors and the author of "A Parent's Guide to the Interscholastic Equestrian Association."

If you enjoyed this blog post, please feel free to like and share on Facebook.
Thanks!  --Amanda

Tuesday, November 18, 2014

Great Idea for Keeping Track of Horses and Ensuring Each Horse Has a Holder at IEA Shows

I had the pleasure of stewarding the Windward Farm IEA shows down in Tampa, Florida this weekend.  I love stewarding outside of my home state of Georgia because I get to see how other teams run their shows and often learn new ways to help IEA shows run more smoothly. This weekend was no exception.

At the Windward Farms shows, all horse holders were wearing name tags on a lanyard around their neck.

The front side of the name tag had the horse's name:
The front of this name tag says the horse's name, Breezy.
Also, my apologies for this blurriness of the photo
(I promise it wasn't like that on my phone!)

The back side of the name tag listed all of the classes that the horse was in or was an alternate for:
This back of the name tag lists the classes the horse is entered in
as well as the classes he is the alternate for.
Name tag rules:
As long as a rider is wearing a particular horse's name tag, she is responsible for holding that horse in the holding area, leading him to the show ring, and picking him up from the show ring after his class. If the rider needs to give up control of the horse to get dressed for her class, take a restroom break, etc. she must find another person to take the name tag first.

This system ensures that:

  • There won't be any horses who come out of the show ring with no handler to take them,
  • The horse provider knows when a horse has a long break between classes and could potentially go back to his stall for a water and bathroom break, and 
  • A horse won't be taken back to the barn area and un-tacked/put away before he's done for the day. 

What a great idea!

I think if I were to expand on this, I would consider putting the name of the team that provided the horse on the front side and the horse's crop and spur information on the back side.

Thank you again Windward Farm for having me as your steward!

Amanda Garner is an Interscholastic Equestrian Association (IEA), Intercollegiate Horse Show Association (IHSA), and Georgia Hunter Jumper Association (GHJA) steward, schooling show judge, head coach of the University of North Georgia IHSA Equestrian Team, and owner of Epiphany Farm, LLC in Dahlonega, Georgia. She is also a member of the IEA Board of Directors and the author of "A Parent's Guide to the Interscholastic Equestrian Association."

If you enjoyed this blog post, please feel free to like and share on Facebook.
Thanks!  --Amanda


Tuesday, November 11, 2014

Splitting & Combining Classes--IEA Guidelines

As I'm sure you all have noticed, most IEA shows offer multiple sections of the same class (class 1A, 1B, 2A, 2B, etc.). This is because the IEA has guidelines for class size and when classes should be split.

IEA classes can also be combined if there aren't enough entries to permit a stand alone class. This happens every now and then at some of the smaller shows.

Today's blog discusses the IEA's class split guidelines for larger shows and class combining guidelines for smaller shows.

As usual, our discussion will follow the rule book.  Quotes from the IEA rule book are in bold text.

A minimum of three (3) IEA Teams must compete in an official Regular IEA point show for team points to count towards qualifying for Regional, Zone and National Finals.

A high school show needs three high school teams.
A middle school show needs three middle school teams.
A combined high and middle school show needs three high school and three middle school teams.

In order for a show to count, a host must offer either (a) all classes in the Futures divisions and/or (b) all classes in the Varsity/Junior Varsity divisions as provided in these Rules.

A high school show must offer all high school classes (Varsity/Jr Varsity).
A middle school show must offer all middle school classes (Futures).
A high school and middle school combined show must offer all classes, high school and middle school (Varsity/Jr Varsity/Futures).

For example, a high school show could not only offer the 2'6" and 2' divisions and not offer cross rails and beginner.

In order for a class to count towards accumulated points, there must be a minimum of three (3) riders in each class. If there are less than three (3) riders in a class, the riders should be placed in another class of the same level. The class could also be run at discretion of the EHC* but points will not be counted. (*EHC = Event Host Coordinator, which is just another word for the host team)

This is where it gets a little tricky.  If there are less than three entries in a class, in order for those riders to receive points, the middle school class must be combined with its corresponding high school class, or vice versa.

Here is how the classes are combined if there are less than three riders in a class:

Hunt Seat:
Varsity Intermediate Fences 2' and Future Intermediate Fences 2'
Varsity Intermediate Flat and Future Intermediate Flat
Jr Varsity Novice Fences Crossrails and Future Novice Fences Crossrails
Jr Varsity Novice Flat and Future Novice Flat
Jr Varsity Beginner Flat and Future Beginner Flat

Western:
Varsity Intermediate Reining and Future Intermediate Reining
Varsity Intermediate Horsemanship and Future Intermediate Horsemanship
Jr Varsity Novice Horsemanship and Future Novice Horsemanship
Jr Varsity Beginner Horsemanship and Future Beginner Horsemanship

It is most often the middle school classes that don't have the minimum number of entries, and thus have to be combined with high school.

For example, a show may have seven entries in Varsity Intermediate Fences, but only two entries in Future Intermediate Fences, in which case the two classes would be combined into one class of nine riders; seven high school riders and two middle school riders competing together.

Each rider in the class receives individual points based on her placing, regardless of how the class is combined.  For example, a middle school rider competing in a combined high school/middle school class would receive points in her middle school division.

The same is true for point riders.  The middle school teams would receive points in the corresponding middle school class and the high school teams would receive points in the corresponding high school class.

Also, it is important to note, a show host can choose to run a class with only one or two riders, but that class would not count for individual or team points.  I've never had this happen at a show I've stewarded.

Hunt Seat flat classes and Western horsemanship classes classes MUST be split at twelve (12) riders.  Over Fences and Reining classes MAY be split at twelve (12) riders.

Classes that run as a group (flat and horsemanship) must be split at 12 riders.  Classes where riders compete individually (fences and reining) may be split at 12, but they don't have to be split at all no matter how many entries there are.  This decision is made by the EHC.

The EHC will run, award ribbons, and issue points separately for each of the split classes, as though the class was not split.

For example, if Varsity Intermediate Flat is split into two sections (section A and section B), each section will be awarded ribbons first through sixth place and riders who place first through sixth will get individual points for that placing.

However, each team only gets one point rider per class, regardless of how many splits the class has. For example, if Varsity Intermediate Flat class is split into two sections (section A and section B) each coach only gets one point rider for the entire Varsity Intermediate Flat class.  The point rider can be in the A or B section.

This means that you can have two teams who earn 7 team points in a class that has two sections.  For example, Hillmar Farm's point rider may win section A of Novice Flat and Oak Creek Farm's point rider may win section B of Novice Flat.  Both teams would be awarded 7 team points for Novice Flat. You could also have two teams withe 5 points, two with 4 points, etc.

The assignment of riders to each split class shall be equitable; however, no one section can have fewer than six (6) riders in it for points and awards to be given.

If a class is split, each section must contain at least six riders.  So a class of 12 could be split into two sections of six riders each: 6-6.

A class of 18 could be split into three sections: 6-6-6, or it could be split into two sections 9-9.

A class of 17 would be split 9-8.  It could not be split three ways into 6-6-5 because you must have at least 6 riders per split.

This comes into play on the morning of a show when you have a class of 12 riders split 6-6 and a coach informs you that one of her riders has the flu and is unable to compete, which brings the total number down to 11 riders, which can't be split because you would have one class with only 5 riders.

If this happens, any team competing in the show may place a new rider in the sick rider's spot to keep the class split.  If a replacement rider cannot be found, the class must run as one section with 11 riders.

A Question of Fairness
Some parents have asked why the IEA has these split/combine guidelines, particularly on days when a rider is ill and a class that is split 6-6 must be combined to an 11 rider class, or when a middle school class must be combined with a high school class.

In my opinion, the IEA has these guidelines to maintain a nationwide standard.  It would be unfair for a rider in Georgia to compete in a class that is split 6-5 while at a show in Maryland the class is held in one section of 11 riders.


Amanda Garner is an Interscholastic Equestrian Association (IEA), Intercollegiate Horse Show Association (IHSA), and Georgia Hunter Jumper Association (GHJA) steward, schooling show judge, head coach of the University of North Georgia IHSA Equestrian Team, and owner of Epiphany Farm, LLC in Dahlonega, Georgia. She is also the author of "A Parent's Guide to the Interscholastic Equestrian Association."

If you enjoyed this post, please take a moment to like and share on Facebook.  
Thanks! -- Amanda
photo credit Autumn Vetter

Tuesday, November 4, 2014

Horse Showing in the Cold

For those of you who don't know, I'm a southern girl, born and raised in northern Georgia, and I don't like to be cold.  But, for us IEA or IHSA people, showing in cold weather is simply a fact of life.

I just got back from a super fun, but absolutely freezing weekend at a horse show with my IHSA team, so I decided that this week's blog would discuss tips for handling cold weather horse shows.

Unfortunately there is no miracle cure for dealing with the cold, sometimes you just have to tough it out, but here are a few tips that may make those cold horse shows a little more bearable.

  • Dress in layers.  A pair of jeans and some cute shoes may suffice for walking back and forth to class on a school day, but if you're going to spend several hours outside at a horse show, you need to layer up. Most people have plenty of layers for their upper body, but they neglect to layer on their lower body.  My IHSA team has matching "snap-away" pants that they wear over their breeches that are easy to get on and off without removing their boots.  I have also seen IEA teams with matching fleece pants to wear over riding breeches.  I personally prefer coveralls that I can pull on or take off easily depending on how warm or cold I'm feeling.

  • Wear a hat. Studies show that up to 30 percent of heat loss occurs through a person's head. A hat helps stop that heat loss.  You should also wear something over your ears, like a fleece head band, beanie, or ear muffs.

  • Invest in a good pair of winter boots. You will, of course, wear your riding boots when you show, but the rest of the time you should wear shoes or boots along with thick, quality socks (like wool) that protect your feet from the cold.  I find that if I can keep my feet and my head warm, the rest of my body will be okay. If you're ever at a show where I'm stewarding, ask me to show you my shoes. They're actually snow boots.  Students tell me all the time that their feet are cold and they can't feel their toes, but my feet have never been cold in my boots. Here's the link if anyone is interested: Columbia Women's Bugaboot Plus II Omni Heat.

  • Wear gloves.  Just like your head and your feet, you lose body heat through your hands. Mittens actually keep your hands warmer than gloves, but it can be hard to maneuver around horses with mittens.  I have a pair of "glittens," fingerless gloves with a mitten flip top that I use when I'm stewarding so I can use my fingers to write.

  • Don't underestimate the warmth of the sun.  If the show is in a covered arena, step out into the sun every now and then to warm up.  At these shows you may want to volunteer to hold a horse just so you can stand in the sun, lol

  • Stay hydrated.  Your body needs water in the winter, just like it does in the summer. The problem is, when you're cold, you might not notice that you need to drink. Make a point to drink water or sports beverages (like gatorade or powerade) throughout the show day.

  • Eat something!  I know many riders feel that they can't eat before they show due to nerves, but your body needs nourishment to keep you warm.  Try to eat plenty of protein and stay away from sugary snacks like candy and donuts. Warm beverages like hot chocolate can help warm you up from the inside out.

  • Have a designated warm space for your team.  Many teams bring tents with side walls to block the wind, lots of blankets, and even portable electric or propane heaters.  Spend time in your team's warm space every so often to warm yourself up (without neglecting your team mates or your responsibilities of course).

  • Warm up before you ride.  Take a few moments before you mount up to get warm in your team's designated warm space.  If you don't have a team warm space, you can go to another heated area like a bathroom, or even sit in the car for a few minutes. If none of these options is available, you can move around a bit or even jump up and down to loosen up your arms and legs and get the circulation flowing. 

  • Keep your coat on as long as possible. There is no rule against keeping your winter coat on while you are mounted in the horse holding area waiting to go into your flat class or even when jumping your two schooling fences before entering the show ring.  Keep your layers on as long as you can.

UNG rider Mary Rogers wearing her
coat in the holding area while waiting to
go in for her flat class
photo credit:  Amanda Garner

  • Make use of your horse's clothing.  While the horse you're holding goes into the show ring, feel free to wrap up in his blanket or cooler, he won't mind :-)

UNG riders Autumn Vetter, Anika Cook, and
Chrissy Crockett all bundled up in Casino's blanket
photo credit:  Amanda Garner

  • Keep an eye on yourself and your teammates.  If you don't feel well or notice that a teammate is acting like she may be suffering from cold-related illness, don't hesitate to tell a show official or other adult.  All IEA and IHSA shows have medical personnel on-site that can assist with temperature-related issues or illnesses.

Other than moving to Wellington for the winter (we can all dream, right?), there is no miracle cure to being cold.  Your best defense is to be properly prepared, have the clothing you need, and keep yourself fed and hydrated.  Happy horse showing!


Amanda Garner is an Interscholastic Equestrian Association (IEA), Intercollegiate Horse Show Association (IHSA), and Georgia Hunter Jumper Association (GHJA) steward, schooling show judge, head coach of the University of North Georgia IHSA Equestrian Team, and owner of Epiphany Farm, LLC in Dahlonega, Georgia. She is also the author of "A Parent's Guide to the Interscholastic Equestrian Association."

If you enjoyed this post, please take a moment to like and share on Facebook.  
Thanks! -- Amanda

Tuesday, October 21, 2014

Reins and Sticks and Spurs...Oh My!

I had a nice conversation with a judge-friend recently. She remarked how many competitors rode well, but had small deductions in their score due to a lack of attention to detail, such as riding with their reins twisted and/or holding the crop incorrectly, that kept them out of the high ribbons.

So for today's blog I will illustrate proper rein and crop carriage.  I am also including a discussion on proper spur and stirrup leather positioning just for good measure.

Before we begin, I'd like to say a big thank you to my judge-friend for the suggestion (you know who you are, lol) and to IHSA rider Anika Cook and lesson horse Simon for acting as models.

Correct Rein and Crop Position
The picture below demonstrates correct rein and crop position.  A few things to note:
  • The reins should lay flat against the horse's neck from the bit up to the rider's hands, with no twists.
  • The "bight" of the reins (the loopy part at the end including the buckle) should come upward out of the rider's hands and fold neatly under the reins.
  • The crop should rest on the rider's thigh.

Here are a few pictures of common rein and crop mistakes.

Common Rein Mistakes
  • Reins and bight twisted (also end of nose band not in keeper!)
  • Bight flopped over reins, not tucked neatly underneath

Common Crop Mistakes
  • Crop hanging straight down from rider's hand.  Note how this creates a break in her wrist, interrupting the elbow-hand-bit line.
  • Crop sticking out perpendicular to the horse.  Note how the rider's hand is turned sideways in a "piano-hands" position.

Where should you put the bight?  The left or the right?
There is no rule about which side of the neck the bight should rest upon; however, many trainers follow the easy-to-remember phrase "bight on the right" because, as the rider enters the ring tracking left, the bight is out of the judge's view on the opposite side of the neck, creating a clean and tidy first impression.

Correct Stirrup Leather Alignment
The stirrup leather should lay flat against the rider's leg (not twisted).

  • Correct stirrup leather

Incorrect Twisted Stirrup Leather
If the stirrup leather is twisted, it won't lay flat against the rider's leg.  This is unsightly and uncomfortable for the rider.

  • Twisted stirrup leather


Correct Spur Placement 
Spurs can be placed on the spur rests on the rider's boot heel or below the spur rests lower at the bottom of the heel.
  • Spur sitting on spur rest on rider's heel
  • Spur sitting below spur rest at the bottom of the rider's heel.  If necessary, the spur can be placed even lower than this, all the way down even with the sole of the boot where the boot heel meets the sole.

Either of these spur positions is correct.  The higher the spur is placed on the heel, the more effective it is.  A coach may choose to put the spur low on the heel if the horse doesn't need much spur or if she is concerned that the rider may accidentally overuse the spur.  She may choose the higher option if the horse is dull to the leg or reluctant to canter.

Rolling spur straps to make them smaller
In IEA and IHSA shows, the riders are instructed to use the spurs that are provided with the horse. Sometimes the spur straps are too large for the rider's foot.  This problem can be easily remedied by wrapping the spur strap, the same way we wrap stirrup leathers, as shown in the picture below.

  • Spur strap rolled correctly


Make sure the spur is on the correct foot
The spur straps should come across the top of the foot from inside to outside.  The end of the strap should rest against the outside of the foot facing out and back, as shown in the picture below.

  • Spur on correct foot


If the spur is on the wrong foot, the end of the strap will be on the inside facing the horse's side, which looks unsightly, but more importantly, it can poke or tickle the horse causing miscommunication during the ride.

  • Spur on incorrect foot


A little attention to detail goes a long way
Taking care of small details like those described above can give you a little extra bump in your score, and in a tough class that can mean the difference between first place and a lower ribbon.

If you enjoyed this post, please like and share on Facebook.  Thanks!  --Amanda

Amanda Garner is an IEA and IHSA steward, IHSA coach, IEA board member, and the author of "A Parent's Guide to the Interscholastic Equestrian Association." 

Tuesday, October 7, 2014

Horse Holding Rules and Etiquette

I received an email last week from someone who read my book, "A Parent's Guide to the Interscholastic Equestrian Association."  She indicated in her email that I needed to discuss holding area rules and horse holding etiquette.  I thought that sounded like a fantastic idea, so here ya go:

Holding Area Rules
The first rule is that only horse holders, coaches, and riders who are currently mounting and dismounting are allowed in the holding area.  This is purely for safety reasons.  The holding area is often not very large and if the area gets too crowded someone may get kicked or stepped on.  

Riders aren't allowed to mount until they are instructed to do so by the schooling supervisor. For flat classes this is usually when the previous flat class reverses. For fence classes it is usually about three to five trips out.

Sometimes a horse is used in two flat classes back-to-back or twice in one fence class. The show officials are aware when this happens, and always allow the second rider adequate time to mount and prepare for her ride.

Riders are not allowed to school the horse or practice in any way while they are standing in the holding area or waiting outside the show ring. This includes use of the crop.  Riders may only use their crop during their two warm up fences and while in the show ring.

If a horse requires a spur, the spurs should be provided with the horse, often attached to the stirrups on the saddle.  If you ride a horse with spurs, make sure the take the spurs off and put them back on the saddle when you're done.

Regarding tightening girths and moving saddles up, "no rider, coach or anyone else without the approval of either the schooling supervisor or the show steward may adjust any tack or equipment, except stirrup lengths" (IEA rulebook).  In the coaches meetings that I lead as show steward, I establish who has permission to adjust girths and move saddles up from horse providers and note any horses whose girths or saddles should not be adjusted by anyone except the horse provider.  For all other tack (bridles, bits, martingales, etc.) only the horse provider should make those adjustments.

Lastly, and perhaps most importantly, the horse holder must maintain control of the horse from the time the rider mounts until she enters the schooling ring or show ring. The rider should never walk freely around the holding area without a horse holder leading the horse.

Horse Holder Etiquette
Speaking of horse holders, this section provides a few tips for horse holder etiquette.  The skill and attentiveness of your team's horse holders can determine how efficiently and safely the show runs.

If your team brought horses to the show, your coach will let you know which classes your horses are in.  Pay attention to the show and bring your team's horses up to the holding area at least one class before they are needed so the rider has time to mount.  This applies to horses that are alternates, too.

The horses should be held at a safe distance from each other in the holding area and the holders should take care not to stand directly behind another horse.  At least one horse-length away from other horses on all sides is often considered a safe distance.

Holders should be alert and attentive at all times so they can react if a dangerous situation arises, such as another horse getting too close, or a tent blowing over causing some of the horses to spook.

The horse holder must maintain control of the horse while the rider is mounting, stay with the horse while waiting for the class to begin, and lead the horse to the in-gate.  It's tempting sometimes to wander off once a rider gets mounted, but the rider is not allowed to school the horse before she enters the arena, so the holder must maintain control of the horse.

The horse holder's job isn't done once the horse enters the arena.  She must wait by the gate for the rider to exit the ring and take control of the horse so the rider can dismount. If the holder can't pick the horse up after the class because she has to get ready for her class, she should coordinate with a team mate to get that horse.  Don't leave the show rider stranded holding the horse!

If you are the show rider that is stranded with a horse, politely tell the schooling supervisor and hold the horse until a holder can be found.

Holders should always stand while holding. It is tempting to sit down during a long day, especially if the horse you're holding is a saint, but it just isn't safe.  Also, the stirrups should be run up and the reins should be held so that they aren't touching the ground.  If the horse is wearing a martingale, the holder should check frequently to make sure it hasn't slipped up the horse's neck.

If it is chilly outside, you can put a cooler on the horse between classes, as instructed by your coach. If it is downright cold, you may need to put a blanket on between classes to keep his muscles warm.

Horse holders should dress comfortably.  Many like to cover up their show clothes with team apparel. The only clothing requirement for horse holders is closed toe shoes for safety purposes.

Horse holders should feel free to talk to the rider about the horse and share their personal advice on how the horse goes; however, the rider and coach should keep in mind that the advice came from well-meaning student and factor that into whether they take it or not.

Holders should offer their horses water periodically.  Many IEA shows take place when its very cold outside, but the horses still need to drink.  They also should go back to their stalls a couple times per day so they can pee.  Make sure you confirm with the schooling supervisor that the horse isn't needed for an upcoming class before taking him back to the stall for a water or pee break.

And lastly, always confirm with the schooling supervisor that the horse is completely done for the day, including any classes in which he may be an alternate, before taking him back to the stall to untack.  I always feel bad for a horse who has already been taken back to his stall and untacked who then has to be tacked back up again for one last class because the holder took him back too early.

As an example, the two young ladies in the picture below are doing a great job holding their team's horses.  They are alert and attentive to their surroundings, the horses are a safe distance from each other, the holders are standing (not sitting), they are wearing closed toe shoes and comfortable clothing (with team logo--added bonus!), the stirrups are run up on the saddles, and the reins are not touching the ground.  

Anna Kirsten Todd and Sarah Rose Perlich of the Birmingham Interscholastic
IEA team holding team horses Rosie and Jessie at last weekend's show.
Photo Credit--Amanda Garner
If you enjoyed this blog post, please take a moment to like and share on Facebook.  If you have an idea for a topic, please leave me a comment or send me an email through my website www.epiphany-farm.com.  Thanks! Amanda

Tuesday, September 30, 2014

Proper Horse Turnout for IEA Shows

I stewarded my first IEA show of the season on Sunday, hosted by Milton High School at Wills Park in Alpharetta, Georgia. I was pleased with the overall turnout of the horses in the show and decided to write about it in this week's blog.

Below is Milton High School horse, Petey. I'm going to use him as my model as I discuss proper horse turnout in IEA shows.

Milton High School IEA Horse, Petey.  A Good Example of Proper Turnout for IEA Shows.
Photo Credit--Ashley Wilson


Appropriate and safe is always more important than fancy.  
Petey is not a 17 hand warmblood with 3'6" potential, and he doesn't have to be. He is a 15 hand quarter horse with a heart of gold who will carry his riders safely around a fence course while allowing them to demonstrate their equitation skills.  

Horses should be clean and well groomed.
Petey is not body clipped, nor is he braided or wearing a fake tail. He is, however, freshly bathed and groomed. His mane is pulled and his tail is brushed and free of tangles and shavings. His fetlocks, muzzle, ears, and bridle path are trimmed. His weight is good and his feet have been recently trimmed.

Tack should be clean, well-fitting, and workmanlike.
His tack has been cleaned and oiled on a regular basis, not just the day before the show. The bridle and martingale fit correctly and all the leather parts are in their keepers. The martingale stopper fits snugly enough to keep the martingale in place. The saddle is of workmanlike quality and the style (close contact) is appropriate for hunter seat equitation. The saddle billets and stirrup leathers are safe and in good repair. The stirrups are plain fillis and have stirrup treads.

Saddle pads and fuzzy girths should be freshly laundered.
The girth and half pad are obviously not new, but they have been washed and are clean and fluffy. The saddle pad is also clean and has a nice team monogram on the side. Petey's name tag is pinned securely on the right hand side.

Boots and wraps should fit well and be conservative in color
Finally, Petey's splint boots fit well, are on the correct legs, and are a conservative color. Bell boots and polo wraps are also permissible in IEA shows. They should also be a conservative color (black, brown, or white, as appropriate for the horse's color).


IEA riders, how can you properly turn out your horses at IEA shows?

Start at home with a daily regimen of grooming and tack care
If you want your team horses' coats to gleam with a healthy shine at the horse shows, you need to groom them thoroughly at home on a regular basis, not just the day before the horse show. Take time before and after each lesson to curry and brush their coats, get the mud off their legs, and untangle their manes and tails. If it's warm enough, hose your horse off after you ride.

Clean the tack every time you ride. Take time after your lesson to clean and condition the leather on the saddle, bridle, and any other tack the horse wears, such as a martingale. Keep an eye on the stitching on the bridle and stirrup leathers and let you coach know if anything needs repair.

If the horse you lessoned on wore boots, wipe them down after the ride or, if it was really muddy that day, hose them off in the wash rack. Don't leave dirt or mud on the boots. Over time, not only will it cause the boots to look dull and dirty, it can actually damage them and make them wear out faster.

Wash saddle pads, half pads, fuzzy girths, and polo wraps on a regular basis, not just the day before the show. If you wash them regularly, they are more likely to stay the color they were when you bought them, and they will be softer and more comfortable for the horses.

Put an extra shine on everything the day before the show
If it's warm enough, give the horses a bath, making sure you shampoo them all over and condition their tails. If it's too cold for a full bath, you can give them a sponge bath.

Pull their manes (only under the guidance of your coach). If you don't know how to pull a mane properly, watch your coach or an experienced team mate so you can learn for next time.

Take a good look at all the tack. Give it one last cleaning, and while you're at it, make sure everything is in good working order. Tell your coach if you notice something that doesn't look right. Make sure that you have a freshly laundered saddle pad for each horse, as well as any other cloth tack each horse wears (half pad, fuzzy girth, polo wraps, etc.)

Keep in mind, if your whole team has been keeping up with the daily grooming and tack cleaning, the day before the show will be a whole lot easier and less stressful.

Get it right on show morning
The morning of the show, give the horses one more thorough grooming and clean up any manure stains they may have gotten in the stall the night before. Clean their hooves inside and out, making sure there is no dirt or mud on the outside of the hoof. Brush the mane and tail, getting all of the shavings out.

Tack them up properly, making sure that the saddle pad is even on both sides, the half pad is positioned correctly, and the girth is the right size (you should have a couple extra holes on the billets above the girth on both sides in case it needs to be tightened later).

Put the boots on the correct feet, with straps facing backwards, or make sure the polos are wrapped correctly. If you don't know how to put on polos, ask your coach or an experienced teammate to do it while you watch and learn.

After you put on the bridle and martingale, check that all the fittings are in their keepers and you have no leather straps hanging out of place.

Take pride in your horses' turnout
Proper turnout of your team's horses at IEA shows demonstrates not only that you have respect for the judge and equestrian sport in general, but also, because you are preparing your horses to look their best for other competitors to ride, it also demonstrates good sportsmanship.

If you the horse you drew is turned out especially well, take a moment to tell the horse holder and let her know you appreciate all the hard work her team put into getting the horses properly prepared for the show. It always feels good to know that someone noticed all your hard work and appreciates it.

Thank You!
I'd like to say thank you to the Milton High School IEA team and coach Lauren Kambler for turning their horses out well and allowing me to use their sweet Petey as a model. I think he was enjoying all the attention!

If you enjoyed this post, please take a moment to like and share on facebook. Thanks! --Amanda


Tuesday, September 23, 2014

IEA Equitation Over Fences--Tips for Improving Your Performance

First off, thank you to everyone for the positive response to last week's post, Equitation on the Flat--Tips for Improving Your Performance.  I decided to follow up this week with a post about fence classes.  Here are fifteen tips for improving your performance in IEA Equitation Over Fences:

Your Warm-Up Fences
The IEA format allows riders to jump two practice fences before executing their course. You can learn a lot about the horse you are riding during the warm up.

1.  Use your two warm up fences to figure out your horse.  Does he lag behind your leg or pull you to the fences?  Does he have a flat or round jump?  Does he have an abnormally long or short stride?  Does he have a simple or flying change? 

2.  Use your two warm up fences to determine if your horse needs a spur or crop.  If the horse description sheet indicates that a spur and/or crop is optional, I recommend going into the warm up with the spur and/or crop.  You can always remove the spurs or drop the crop before going into the show ring if you determine from your warm up that you don't need them. 

3.  Use your two warm up fences to practice any special tests required in the course, such as a halt or trot fence.  If the course requires a halt, I recommend performing a halt after jump one, then picking up the canter again for fence two.  If the course has a trot fence I recommend cantering the first warm up fence, then transitioning to a trot for the second warm up fence in order to determine the horse's willingness to break to a trot from a canter after a jump.

Your Equitation Over Fences Round
Once your two warm up fences are complete, its time to head into the show ring for your fence round.

4.  Have a plan for the beginning of your course.  Are you going to do an opening circle or head straight to fence one?   Are you going to do posting trot then canter; sitting trot then canter; or go directly from the walk to the canter?  All of these are permissible in IEA shows.

5.  Have a plan for the end of your course.  Are you going to do a closing circle or head directly to the gate and walk out?  Are you going to transition down from the canter to a posting trot, sitting trot, or directly to the walk?

6.  Enter and exit the arena at a walk.  Entering or exiting at a gait other than the walk can be cause for elimination in IEA shows.

7.  Make note of any special ring instructions and make sure you follow them.  For example, a dotted line may be drawn on the posted course diagram delineating the area for your opening circle.  Crossing the dotted line while doing your opening circle is cause for elimination.  Also, the course may instruct riders not to do an opening and/or closing circle. Not following these instructions may result in a major penalty from the judge.

8.  Enter the ring ready to win.  Be ready at the gate with your game face on.  Have your feet situated correctly in the stirrups and your reins organized.  As soon as the ring person opens the gate, walk in with purpose and begin your course.  Judges don't like to be kept waiting.

9.  Don't cut your corners.  Use the whole arena and make square turns to the fences.  One of my trainers used to say, "you're paying for the whole arena, you might as well use it..."

10.  Do the striding that is appropriate for the horse/pony you a riding.  If you drew a 17 hand warmblood with a huge stride, it may be appropriate to go for the horse show step.  If you are riding a 15 hand quarter horse with a short stride, the add may be the better choice. Also, be consistent.  If you start with the horse show step, maintain the horse show step throughout your course.  The same with the add step.

11.  Establish a nice, forward rhythm right from the start and maintain it throughout your course.  I find that if you concentrate on keeping a forward, consistent rhythm, the jumps will come up nicely.

12.  Get your leads in the corners, whether simple or flying.  Simple changes are not penalized in IEA competition.  If the horse description sheet says the horse has a flying change, give him one chance.  If you don't get it, or you only get the front, perform a simple change to get on the correct lead.  Always try to get your new lead before you reach the corner.

13.  If you have a refusal, take a moment to catch your breath and gather your composure, then circle back around and try again.  Don't get in a hurry.  Take your time to set up an organized approach.   

14.  Even if you make a major error or feel that you had a bad round, exit the arena with your head held high and a pleasant expression on your face.  Never show disappointment or frustration while in the show ring.

15.  Most importantly, do the best you can with what you are given.  IEA competition is about showing the horse you are riding to the best of his and your ability.   The judges want to see you create the best possible ride on whichever horse you drew.

If you enjoyed this post, please feel free to like and share on facebook.  --Amanda
IEA Rider Amelia Stone, photo credit Kensie Arnold


Tuesday, September 9, 2014

Tips for an Efficient Morning Schooling Session at IEA Shows

As IEA season approaches, some coaches have contacted me about stewarding their shows and asking me how they can run their shows more smoothly.  So I decided to do a couple blogs for IEA coaches (and team parents and riders too!) giving some suggestions for running smoother, more efficient shows.

Today's blog post gives ten suggestions to help the morning schooling session run more efficiently while also allowing each horse the schooling time he needs to perform at his best.

1.  It is helpful to split your show day in half and hold two separate schooling sessions:  a 2'6" and 2' schooling session in the morning followed by the 2'6" and 2' fences and flat classes, then a cross rail and beginner flat schooling session at mid-day followed by the cross rail fences and flat and beginner flat classes in the afternoon.

2.  Decide beforehand whether your morning schooling session will start with 2'6" or 2' and make sure everyone who is providing horses knows this so there is no confusion as to which horses should be tacked up first.

3.  Ensure that the horse providers know which heights their horses are jumping beforehand so they know when to school.  Don't forget the alternates have to school at their highest height even though they are just an alternate.

4.  Have enough qualified schooling riders so that you don't have horses standing around ready to school, but missing a schooling rider.  Make sure the schooling riders know the course and any special tests that you would like them to school (trot jump, halt, etc.).  The schooling riders should be professionals or experienced juniors or amateurs who can give the horse the schooling he needs to perform well. 

5.  If you are using two rings (a show ring and a warm-up ring) you can allow horses to warm up on the flat in the warm-up ring before entering the show ring for their official schooling session in front of the steward. You can even have a cross rail in the warm-up ring for them to hop over.  Flat-only horses can also get started in the warm-up ring before entering the show ring for their required flat school in front of the steward.  Please remind your horse providers that they can begin in the warm-up ring, but all horses must school in the show ring in front of the steward.

6.  Tell your horse providers prior to the show day that the warm-up ring will open 15 minutes prior to the start of official schooling so that at schooling start you will have some horses already warmed up and ready to enter show ring to school in front of the steward.  

7.  Ensure all horses are wearing name tags so they can be identified by the steward and competitors.  The name tags should be big enough to be legible from a distance and preferably be on both sides of the saddle pad.

8.  Have a dedicated gate person who is responsible for getting the horses into the arena and keeping the number of horses in the ring at one time to a safe number (for an average-sized arena I prefer no more than six horses at a time).  The gate person should communicate with the horse providers to make sure all horses are on their way to the ring in time for their designated schooling session.

9.  Prepare a schooling list for your steward and gate person listing the horses by their highest fence height, including the alternates.  Have your gate person check off the horses as they enter the ring so he/she can keep track of who hasn't schooled yet.  You can also give a copy of this list to your announcer and he/she can announce which horses are needed at the ring.


10.  Have your gate person confirm spur/crop usage against the horse description sheet as each horse enters the ring.  The steward will also be checking this, but it is much easier to catch and fix any discrepancies at the in-gate.

A few notes in conclusion:

The morning schooling session can make or break your show.  The most important thing you can do is communicate with your horse providers in the days leading up to the show so there is no confusion on show morning.  

Also, never rush through the schooling, even if it is running long and your show start time is delayed.  Every horse needs a certain amount of time to prepare for the show day, and if you rush through the schooling you may create more problems later in the day, such as horses being pulled due to lameness or behavioral issues that could have been avoided by having adequate warm up time.

If you enjoyed this blog post, please take a moment to like/share on Facebook.  Thanks!  --Amanda

Steward Monitoring Morning Schooling, photo credit Doug Dershimer

Tuesday, August 26, 2014

Calculating Number of Strides in a Line

Jump courses are set with specific distances between the fences in the lines, and you are expected to get a certain number of strides within those lines.  In today's blog, we will discuss how to calculate the number of strides you should get in a line.

There are three pieces of information we need:
  • Length of the line in feet
  • Length of stride
  • Length of landing and take-off

Length of the Line in Feet
You can find the length of the line in feet from the posted course diagram, or you can walk the line on foot.

Here is a posted course diagram showing the length of the lines:


The line between fences 2 and 3 is 72 feet and the line between fences 6 and 7 is 48 feet.

Length of Stride (12 Feet)
Most jump courses are set on a twelve foot stride, which means that each stride the horse takes should be 12 feet long.

drawing credit Cody Cheek


Length of Landing and Take-Off
We also have to take into account the length of the landing from the first jump and the takeoff point for the second jump. 


6 feet for landing + 6 feet for take-off = 12 feet

You can see in this diagram that the horse lands from the first jump in the line 6 feet away from the first jump, and takes off from the second jump in the line 6 feet in front of the second jump, 6 feet + 6 feet = 12 feet, which is the same as one stride (12 feet).

Now that we have the information we need, we can calculate the number of strides we should get in the lines.

Calculating the Horse Show Stride
The number of strides you should get is the length of the line in feet divided by the length of each stride and minus one for the landing and take-off.  

(Length of Line ÷ Length of Stride) - 1 = number of strides

Let's use the 48 foot line between fences 6 and 7 in the course diagram above as an example:

(48 ÷ 12) - 1

First, take the total length of the line and divide by 12:

48 ft ÷ 12 = 4 

Then subtract 1 to account for the landing/take-off:

4 - 1 = 3  

So a 48 foot line would be 3 strides.   

The diagram below may make it easier to visualize:

6 feet landing + 12 feet + 12 feet + 12 feet + 6 feet take-off = 48 feet = 3 strides


Using this formula, you can calculate the number of strides in a line.

1 Stride Line = 6 + 12 + 6 = 24 feet
2 Stride Line = 6 + 12 + 12 + 6 = 36 feet
3 Stride Line = 6 + 12 + 12 + 12 + 6 = 48 feet
4 Stride Line = 6 + 12 + 12 + 12+ 12 + 6 = 60 feet
5 Stride Line = 6 + 12 + 12 + 12 + 12 + 12 + 6 = 72 feet
6 Stride Line = 6 + 12 + 12 + 12 + 12 + 12 + 12 + 6 = 84 feet

This is known as the "Horse Show Stride," which is the number of strides you would expect to get if you were riding a relatively large horse (maybe 16 hands or taller) and jumping bigger fences (maybe 2'9" or 3' or higher).

Calculating the Add Stride
So what do you do if you are riding a shorter strided horse or jumping smaller jumps? Many horses that are used in IEA/IHSA competition don't have a big-enough stride to do the lines in the "horse show stride."  In that case, you may choose to do the "Add Stride."  

The add stride is exactly what it sounds like, you add one extra stride into each line.   

To calculate the add stride all you have to do is calculate the horse show stride then add one stride.  

If we go back to our 48 foot example:

48 Feet = 3 horse show strides

3 + 1 = 4

48 Feet = 4 add strides

So that's how you do it!  Or, you can just memorize the table below, lol.


In IEA/IHSA competition, you should work to get the appropriate striding for the horse you drew (horse show stride or add stride) and be consistent throughout your course.  For example, if you were jumping the course in the diagram at the beginning of this article and you got 5 strides in the first line you should get 3 strides in the last line (horse show stride).  Or if you got 6 strides in the first line you should get 4 strides in the last line (add stride).

If you enjoyed this article, please take a moment to like and share on facebook. Thanks!  --Amanda